

 Ahmed Shaami
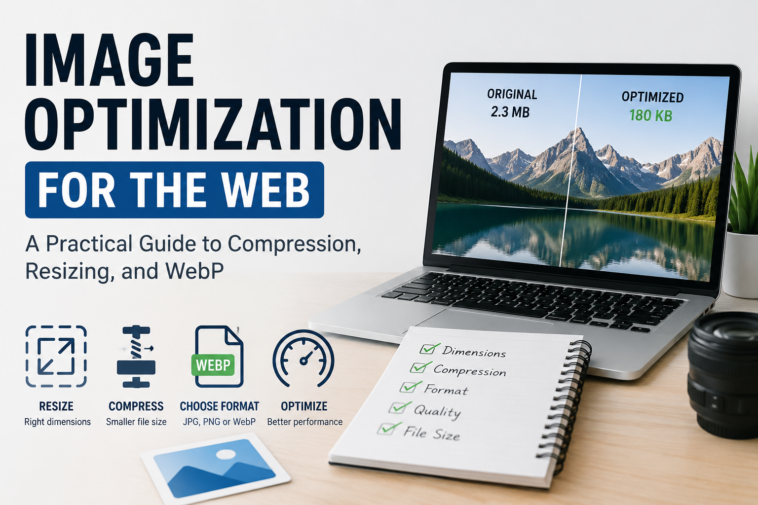
Images can make a website look great, but they can also quietly make it slower.
A photo that looks perfectly reasonable on your computer might be several megabytes. Upload a few dozen images like that to a website and suddenly your media library is huge, pages take longer to load, and mobile visitors have to download far more data than they really need.

The good news is that optimizing images doesn’t have to mean making them look bad.
In most cases, you can get a much smaller file by making a few sensible decisions about image dimensions, compression, file format, and quality.
This guide explains a practical image optimization workflow that works for blogs, WordPress websites, online stores, business websites, and everyday publishing.
What Is Image Optimization?
Image optimization means preparing an image so that it has an appropriate file size, dimensions, format, and visual quality for the way it will be used.
It’s not simply about making an image as small as possible.
A good optimized image should:
- Look good at its intended display size
- Have appropriate pixel dimensions
- Use a suitable file format
- Avoid unnecessary file weight
- Meet any upload or file-size requirements
- Load efficiently for website visitors
The right balance depends on the image and where you’re using it.
A large hero photograph, for example, has very different requirements from a small blog thumbnail or a logo.
Why Large Images Can Be a Problem
Modern phones and cameras produce incredibly detailed images. That’s great when you’re taking photographs, but the original file isn’t necessarily suitable for a website.
Imagine taking a photo that’s 6,000 pixels wide and uploading it to a page where visitors will see it at only 1,000 pixels wide.
The browser still has to download a much larger file than necessary before displaying the smaller version.
This can contribute to:
- Slower page loading
- Increased bandwidth usage
- Larger media libraries
- Poorer experiences on mobile connections
- Unnecessarily heavy web pages
This is why image optimization should ideally happen before an image is uploaded to your website, or at least before the final version is delivered to visitors.
The Four Things to Look at When Optimizing an Image
There are four main areas to consider:
Image dimensions
How many pixels wide and tall does the image actually need to be?
File size
How many KB or MB does the final file occupy?
File format
Would JPEG, PNG, WebP, or another format be more appropriate?
Compression
Can the file be reduced further without noticeably hurting its quality?
These aren’t separate decisions. They work together.
Reducing the dimensions can dramatically reduce file size. Choosing an efficient format can reduce it further, and compression can help you squeeze out additional unnecessary data.
Start by Resizing the Image
One of the most common mistakes is uploading an image at its original camera or phone resolution.
If your website only needs an image to be 1,200 pixels wide, there is usually little reason to upload a 6,000-pixel version.
The exact dimensions you need depend on where the image will appear.
For example:
- A small thumbnail might need only a few hundred pixels.
- A blog image might need around 1,000–1,500 pixels.
- A full-width image may need more.
- A social media graphic has its own dimensions.
- A WordPress featured image may follow the requirements of the particular theme or design.
The important point is to resize according to the actual use case.
Dimensions and file size aren’t the same thing
This is worth understanding.
An image that’s 1,200 × 800 pixels can still be a large file.
Another 1,200 × 800 image might be considerably smaller.
Why?
Because file size is affected by things such as the image content, format, compression settings, and other data stored in the file.
So resizing and compression are often best used together.
If you regularly need to resize images before publishing them, a browser-based image resizer can make that part of the workflow much quicker.
Compress Images Without Destroying Their Quality
Once the dimensions are appropriate, compression is usually the next step.
Compression reduces the amount of data required to store an image.
The goal isn’t to produce the smallest possible file regardless of quality. It’s to find a sensible balance between file size and appearance.
Over-compress an image and you may start seeing:
- Blurry details
- Blocky artifacts
- Loss of texture
- Banding
- Poor-looking edges
On the other hand, a lightly compressed image may look virtually identical to the original while being significantly smaller.
That’s the sweet spot you’re looking for.
What If You Need an Image Under a Specific Size?
Sometimes you don’t just want a smaller image.
You have an actual requirement.
For example:
“The image must be under 200KB.”
This comes up more often than you might think.
You may encounter file-size limits when:
- Uploading images to a website
- Submitting an online application
- Adding images to a marketplace
- Sending files through a form
- Preparing images for a publishing system
- Working with a CMS that has upload restrictions
Normally, you might compress an image, check its size, change the quality, compress it again, and repeat the process.
A target-size tool can make this much easier.
For example, Compress Image to 200KB is designed specifically for situations where the final image needs to be around a particular file-size target.
Choosing Between JPG, PNG, and WebP
The format matters too.
There isn’t one format that’s perfect for every image.
JPG / JPEG
JPEG remains a practical choice for photographs and other images containing lots of colors, gradients, and natural detail.
It’s commonly useful for:
- Photography
- Blog images
- Product photographs
- Travel photos
- General website imagery
JPEG compression can produce relatively small files while maintaining good visual quality.
PNG
PNG is particularly useful when transparency or certain types of graphic detail are important.
It’s commonly used for:
- Logos
- Graphics
- Screenshots
- Transparent images
- UI elements
PNG isn’t necessarily the best choice for every photograph, though. A photographic PNG can sometimes be much larger than a properly compressed JPEG or WebP version.
WebP
WebP is a modern image format designed with efficient web delivery in mind.
It supports both lossy and lossless compression and can also handle transparency.
For many websites, WebP is a useful option when the goal is to reduce image file sizes while maintaining good visual quality.
If you have an existing collection of PNG images, for example, you can convert PNG to WebP rather than manually converting each file.
And if you receive WebP images but need a more widely compatible format for a particular workflow, you can convert WebP to JPG.
Don’t Treat Every Image the Same
A photograph, logo, screenshot, illustration, and product image don’t necessarily need the same optimization settings.
A photograph might work very well as a compressed JPEG or WebP.
A logo with transparency may need a different approach.
A screenshot containing small text may need settings that preserve sharp edges.
This is why “compress everything to exactly 50KB” isn’t a very good image optimization strategy.
Instead, think about where the image will be used and what the viewer needs to see.
Optimizing Images for WordPress
WordPress makes it extremely easy to upload images, but that convenience can also encourage people to upload files that are much larger than necessary.
Before uploading a large image to WordPress, consider:
- What dimensions does the page actually need?
- Is the image being used as a featured image?
- Does it need transparency?
- Would WebP be appropriate?
- Can the image be compressed first?
- Will the image be displayed at several different sizes?
If you’re publishing regularly, preparing images before uploading them can become a simple part of your editorial workflow.
For example, if you need to prepare images for WordPress featured-image requirements, you can use a WordPress featured image resizer before uploading the final image.
A Privacy Question Worth Asking: Where Is Your Image Processed?
There’s another consideration that doesn’t get enough attention when people use online image tools.
Where does your image go when you select it?
Many online services work by uploading your image to their servers. The server processes the file and then sends the result back to you.
For an ordinary stock photo, that might not matter.
But what about a personal photograph, a client’s design, an unpublished product image, or a screenshot containing information you don’t want to send elsewhere?
In those situations, it can be worth looking for a tool that processes images directly in the browser.
Browser-based processing
PublishFit takes this approach for its supported image-processing tools.
The processing happens directly in your browser rather than requiring the original image to be uploaded to a PublishFit server for processing.
In practical terms, that means you can select an image, process it on your own device, and download the result without sending the original file to a remote image-processing service.
That’s useful if privacy is important to your particular workflow.
Of course, you should always check a tool’s privacy information and the specific implementation before using any service for highly sensitive material.
Why Local Browser Processing Can Be Useful
There are a few practical advantages to processing an image in the browser.
Your original file stays on your device
When the processing is genuinely client-side, there’s no need to upload the original image to a remote processing server.
No account is necessary for basic processing
You can get straight to the task instead of creating another account simply to resize or convert an image.
No upload waiting time
You’re not waiting for a large image to upload before the server can start processing it.
It’s simple
Select the image, choose what you need, process it, and save the result.
For people who work with images regularly, that can be a much cleaner workflow.
What About Bulk Image Processing?
Optimizing one image isn’t difficult.
Optimizing 100 images is another story.
Imagine you’ve just downloaded a folder containing hundreds of PNG files and you want to convert them to WebP.
Doing that one file at a time gets old very quickly.
That’s where bulk processing becomes useful.
A bulk tool lets you apply the same type of operation to multiple files in one workflow.
For example, Bulk WebP Converter can be useful when you’re preparing a collection of images for a website or publishing project.
The same idea applies when you need to resize a large batch of images to consistent dimensions.
A Simple Image Optimization Workflow
If you’re not sure where to start, keep it simple.
Step 1: Keep the original
Don’t overwrite your original high-quality image.
Keep it somewhere safe so you can return to it later.
Step 2: Decide where the image will be used
Is it a blog image? Product photo? Featured image? Thumbnail? Banner?
The answer determines the dimensions and quality you need.
Step 3: Resize it
Remove unnecessary pixels by bringing the image down to a sensible size.
Step 4: Choose the format
Use JPEG, PNG, WebP, or another appropriate format depending on the image.
Step 5: Compress it
Reduce the file size while keeping the image looking good.
Step 6: Check the result
Don’t look at the file size alone.
Open the image and make sure it still looks good at the size visitors will actually see it.
Step 7: Publish the optimized version
Use the optimized copy on your website and keep the original as your backup.
That’s it.
For most everyday publishing tasks, you don’t need a complicated workflow.
Common Image Optimization Mistakes
Uploading the original phone or camera image
A high-resolution original is rarely necessary for a normal website image.
Better approach: resize it for its intended display size.
Compressing without resizing
Compression can help, but an image with unnecessarily huge dimensions may still be much larger than it needs to be.
Better approach: resize first when appropriate, then compress.
Converting everything to one format
Not every image needs to be WebP, PNG, or JPEG.
Better approach: choose the format based on the image and how it will be used.
Chasing the smallest possible file
A 20KB image isn’t automatically better than a 100KB image if the 20KB version looks terrible.
Better approach: aim for a practical balance between quality and size.
Ignoring specific upload limits
If a website says the image must be under 200KB, don’t just guess.
Better approach: use a target file-size workflow and verify the final file.
Forgetting about privacy
Uploading every image you work with to an external service may not be appropriate for every situation.
Better approach: consider local browser-based processing when keeping the original file on your device matters.
Image Optimization Checklist
Before uploading an image to your website, ask yourself:
- Is the image larger than it needs to be?
- Are the pixel dimensions appropriate?
- Is the file format suitable?
- Has it been compressed?
- Does it meet the required file-size limit?
- Does it still look good at its intended display size?
- Am I keeping the original file somewhere safe?
- If the image is private, do I know how the tool processes it?
If you can answer those questions, you’re probably on the right track.
The Bottom Line
Good image optimization isn’t about squeezing every image down to the smallest number possible.
It’s about using the right image for the right job.
Resize images when they’re unnecessarily large. Compress them without going too far. Choose an appropriate format. And when a platform gives you a specific file-size requirement, work toward that target instead of repeatedly guessing at compression settings.
For many websites, a simple workflow is enough:
Resize → choose the format → compress → check the result → publish.
And if you prefer not to upload your images to a remote processing service, browser-based processing is another option worth considering.
That’s the approach behind PublishFit, a collection of browser-based tools for resizing, compressing, and converting images. The tools are designed around local processing for supported operations, so your images can be processed directly on your device.
Whether you’re running a WordPress site, publishing a blog, managing an online store, or simply trying to get an image below a particular file-size limit, the goal remains the same:
Keep the image looking good while removing everything your website doesn’t actually need.